AppDev Weekly: Adjusting Alpha Transparency Using Xcode
Welcome to my second article published for AppDev Weekly, my column that I run of MobileOrchard. In this app development tutorial, I’ll be covering some simple programming using Xcode, Apple’s free Mac software used to develop iOS applications. In this tutorial, I’ll be demonstrating how to adjust the alpha transparency of an object, which can come in useful in a variety of situations. This tutorial assumes that you have some basic knowledge in Xcode, but even if you’re a complete newbie it shouldn’t be too hard to follow along. Let’s get started.
The idea of changing alpha transparency is to replace the need to actually transition between various UIViews. For example, let’s say we have some text on a UIView: “James has a lot of food.” With the click of a button labeled “Eat the food,” the text will then be replaced with “James now has no more food.” Simple enough, eh?
Without alpha transparencies, this could be achieved with two UIViews, and hooking the UIButton up to an action to change between them. However, with alpha transparencies, the task becomes a lot easier, as all you have to do is change the transparencies of two UILablels. Follow along using the screenshots below!
Step One: Creating the Xcode Project
Start by creating a simple View based application. This is all you will need to do before adding code yourself.
Step Two: Editing the ViewController .m and .h Files
A common problem that’s come up when I look for tutorials on programming related subjects is that I get the instructions on HOW to do something, but never really a good explanation on what each line of code does and WHY they work together the way they do. I’ll be doing my best to fix this in all of my AppDev Weekly tutorials.
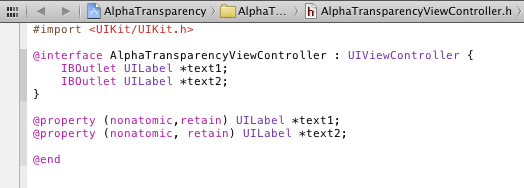
Anyways, let’s start by editing the ViewController.h file, the .h suffix meaning a header file. Once you’re in, we’re going to create two UILabels, which we will then hook up using Interface Builder. Basically, by defining two variables, “text1” and “text2,” we are telling Xcode that there are going to be two labels, one identified as text1, the other as text2. Obviously, it does’t matter what names you use for the variables.
Creating the UILabels is extremely simple, just base your code off of the screenshot below:
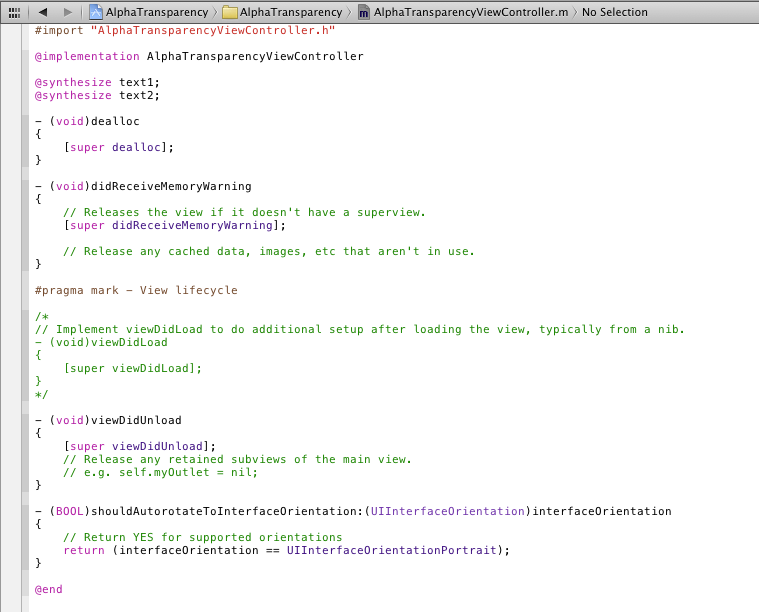
Now, let’s synthesize the two variables we created in the header file in the main (.m) file. Navigate to ViewController.m and @synthesize these two variables. That’s it for now, check out the screenshot below:
Part 3: Going Into Interface Builder
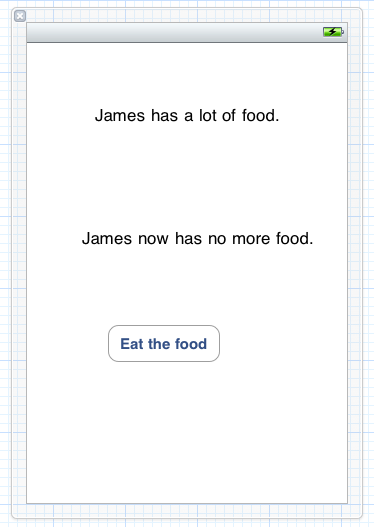
Now let’s start getting into Interface Builder. Navigate to ViewController.xib (the .xib means that it is an IB file) and drag in two UILabels and one UIButton from the object library. Going back to the example above, let’s change the text in these accordingly:
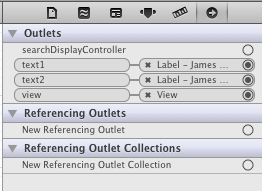
But simply dragging in these interface elements is not enough. We must also hook up variables in the Connections inspector. Click on “File’s Owner” in the “Placeholders” left sidebar, the click and drag to connect the “text1” variable to “James has a lot of food.” and the “text2” variable to “James now has no more food.” Once you’re done, it should look something like this:
Part 4: Setting up the UIButton
Now all that’s left to do is to create an IBAction so that the UIButton “Eat the food” will change the transparencies of the text. To do this, create an IBAction in ViewController.h with the code:
-(IBAction) eat;
Next, hook up the IBAction to the UIButton in the ViewController.xib file, similar to the way you hooked up the two UILabel variables. The action “eat” will show up in the Connections inspector, just drag it to the “Eat the food” button and choose “Touch Up Inside.”
From there’ you’re all set to go to ViewController.m and make the magic happen.
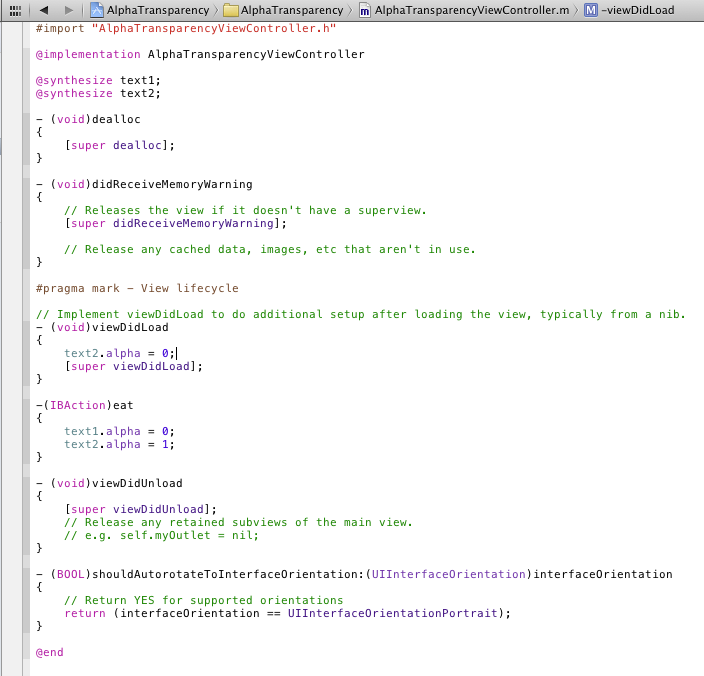
In the viewDidLoad method (this code will be run the moment the app successfully loads) type:
text2.alpha = 0;
This will set the alpha of text2 (the text that will show up after we press the button) to zero (a.k.a. hide it.) Then create a new -(IBAction) called “eat,” which was what we defined as an IBAction in the ViewController.m file. In the -(IBAction), we need to change the transparency of “text1” to 0 (hide it,) and the transparency of “text2” to 1 (show it.) Here’s the code:
And that’s it! You’re all set!
Now let’s see it in action:
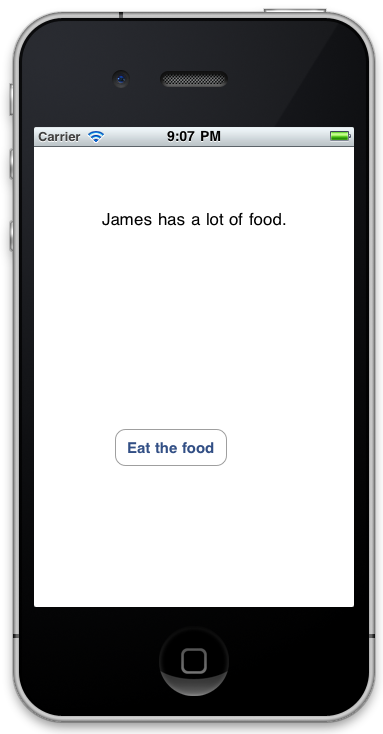
Here’s what the app looks like when we just run it:
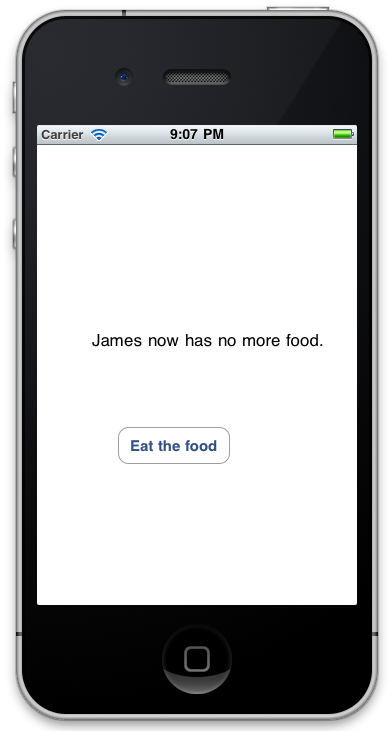
Now let’s click the “Eat the food” button!
As you can see, text1 was hidden and text2 showed up when the button was clicked.
Need more help? Send me an email at [email protected] or download the source code for this project here.


